
Blocked drains can quickly turn into a costly headache for Poole homeowners, especially when water starts pooling in gardens or foul smells fill the air. Ignoring these warning signs risks further property damage and repeated disruption. Understanding how user habits contribute to recurring drainage problems and why blocked pipes keep returning helps you tackle the issue at its source. With simple steps and practical advice, you can restore free-flowing drains and protect your home from future damage while saving time and money.
Table of Contents
- Step 1: Assess Blockages And Prepare The Drainage Area
- Step 2: Select Suitable Tools And Safety Equipment
- Step 3: Apply Drain Cleaning Methods Effectively
- Step 4: Verify Drainage Flow And Inspect For Remaining Issues
- Step 5: Restore The Area And Maintain Preventative Measures
Quick Summary
| Key Message | Explanation |
|---|---|
| 1. Identify blockage causes | Observe symptoms like pooled water or foul smells to determine if the blockage is localised or systemic. |
| 2. Use proper tools and PPE | Select appropriate tools like plungers and drain rods, and always wear protective gear to ensure safety. |
| 3. Apply correct cleaning methods | Employ methods based on blockage type; use plungers for surface issues and drain rods for deeper ones. |
| 4. Verify drain flow and damage | Test the drainage to confirm it’s clear, and check for any visible pipe damage or residual blockages. |
| 5. Implement preventative measures | Maintain drains by flushing with hot water and avoiding inappropriate items to prevent future blockages. |
Step 1: Assess blockages and prepare the drainage area
Before you tackle any drainage problem, you need to understand what you’re dealing with. This step involves identifying the blockage cause, locating exactly where the problem sits, and preparing your drainage area safely for cleaning work ahead.
Start by observing the symptoms. Does water pool around certain areas of your property? Are multiple drains draining slowly, or just one? Is there a foul smell coming from your pipes? These clues tell you whether you’re dealing with a localised blockage or a wider system issue.
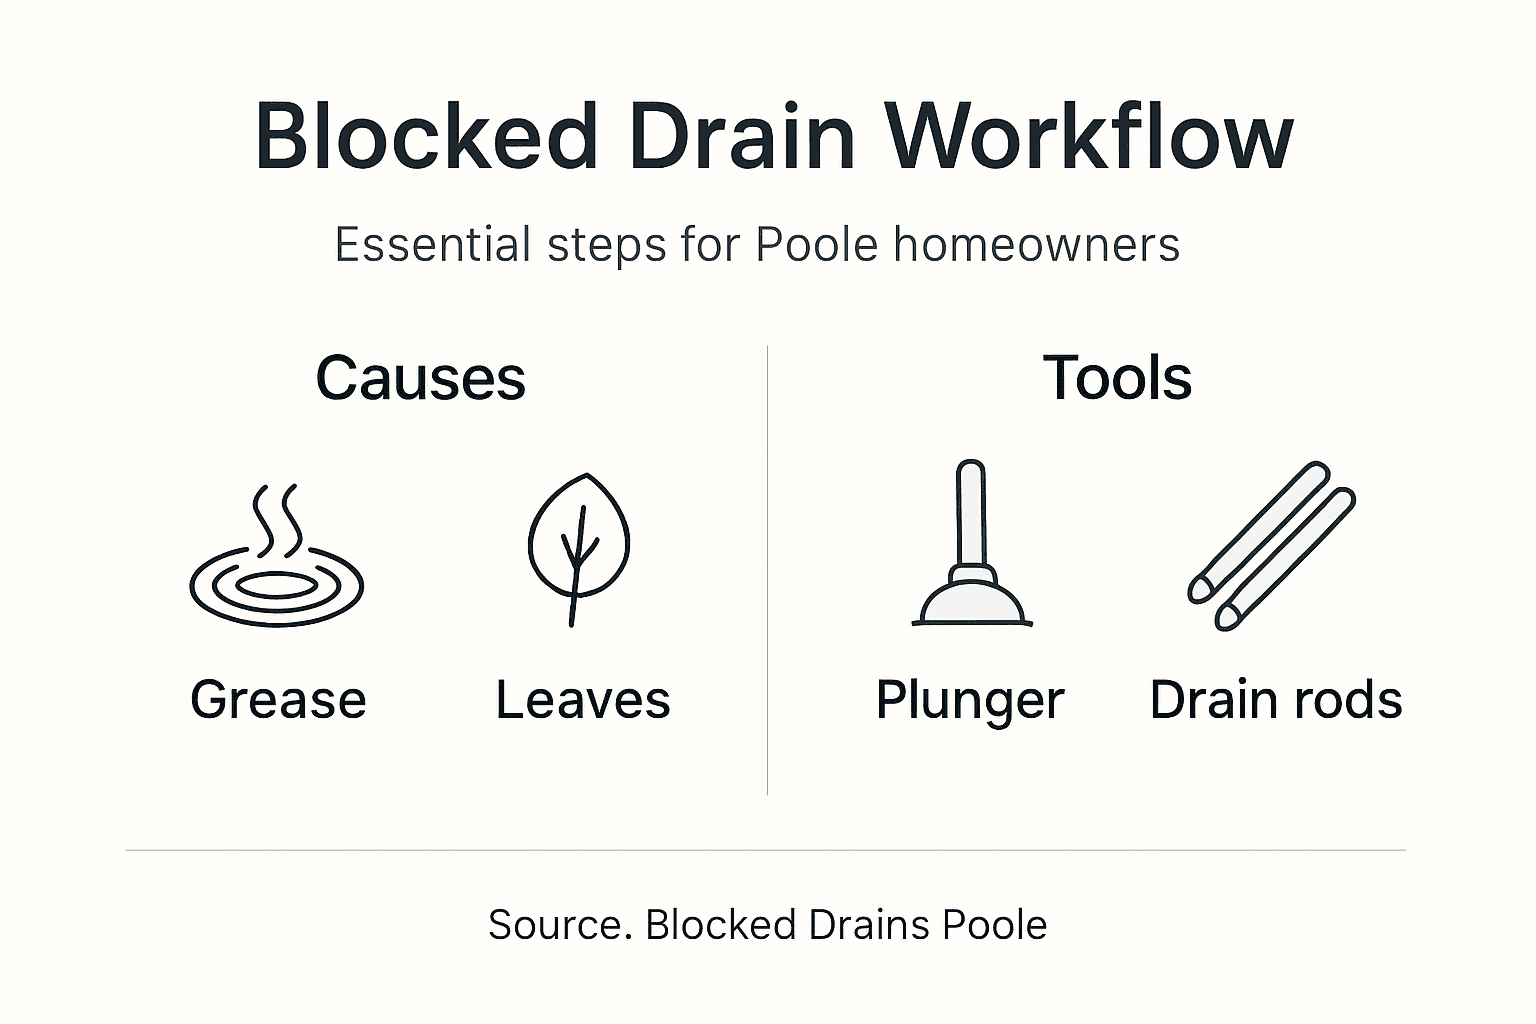
Identify what’s causing the blockage. Common culprits include:
- Fats, oils, and grease (FOG) poured down kitchen sinks
- Wet wipes and personal hygiene products flushed down toilets
- Hair accumulation in shower and bathroom drains
- Broken or collapsed pipes allowing soil intrusion
- Tree roots invading older pipework
Many Poole homeowners don’t realise that their habits are the problem. User habits largely cause drain blockages, from flushing inappropriate materials to disposing of cooking fats incorrectly.
Next, locate the blockage. Walk your property and note which drains are affected. Use visual inspection—check grates, downpipes, and inspection chambers if you can access them safely. Look for backed-up water, debris, or visible obstructions.
Now prepare the drainage area itself. Clear the work zone of obstacles, garden items, or vehicles that might obstruct access. If the blockage is outdoors, ensure you have clear space around inspection covers and drains. Move any items that might get damaged if water backs up unexpectedly.
Check ground conditions. Is the area soggy or waterlogged already? Note the soil type and any surface water pooling that suggests existing drainage problems. This helps explain why your drain failed in the first place.
Identifying the blockage cause before cleaning prevents the same problem recurring within weeks.
Pro tip: Take photographs of pooling water, affected drains, and any accessible inspection chambers before work begins—this visual record helps professionals understand your drainage layout if you need specialist help later.
Here’s a summary comparison of common drain blockage causes and the best matching cleaning approach:
| Blockage Cause | Most Effective Tool | Key Prevention Tip |
|---|---|---|
| Fats, oils, & grease | Plunger, hot water | Dispose in bin, not sink |
| Hair accumulation | Drain brush, plunger | Use traps over drains |
| Wet wipes/products | Drain rods, plunger | Never flush down toilets |
| Tree root invasion | Drain rods, specialist | Check for root growth |
| Collapsed pipes | Professional kit | Inspect old systems regularly |
Step 2: Select suitable tools and safety equipment
Choosing the right tools makes drain cleaning faster, safer, and more effective. The wrong equipment wastes time and risks injury, so this step involves matching your tools to the blockage type and ensuring you have proper protection.
Start with assessing your blockage type. Is it a surface obstruction like hair in a shower trap, or a deeper pipe blockage? Localised blockages near fixtures respond well to plungers and drain rods. Deeper problems may require professional equipment.
For most household blockages in Poole, you’ll need basic tools:
- Plunger (cup-style for sinks, flange-style for toilets)
- Drain rods or a plumbing snake for deeper access
- Bucket for catching water and debris
- Wire brush or drain brush for removing buildup
- Torch or headlamp for visibility in dark spaces
Before using any tool, ensure it’s in good working order. Tools must be fit for purpose and properly maintained to prevent accidents. Check plungers for cracks, drain rods for kinks, and handles for secure attachment.
Now focus on personal protective equipment (PPE). This is non-negotiable. Wear:
- Heavy-duty gloves to protect against bacteria and sharp debris
- Eye protection or safety goggles against splashes
- Closed-toe boots with good grip on potentially wet surfaces
- Old clothing you don’t mind getting dirty or damaged
Drainage work exposes you to harmful bacteria and chemicals. Appropriate PPE like gloves protects you during cleaning work. Never skip this step, no matter how quick the job seems.
Gather everything before you start. Having tools and safety gear ready prevents rushing and accidents. Set up your workspace so you can move freely without tripping hazards.
Proper tool selection and safety equipment reduce injury risk and improve your chances of success.
Pro tip: Invest in a sturdy pair of work gloves with grip texturing—they make handling wet drain rods and tools significantly easier, and they last longer than cheaper alternatives when used regularly.
Step 3: Apply drain cleaning methods effectively
Now that you’ve assessed the blockage and gathered your tools, it’s time to apply the right cleaning method. Success depends on matching your approach to the blockage type and following a systematic process.
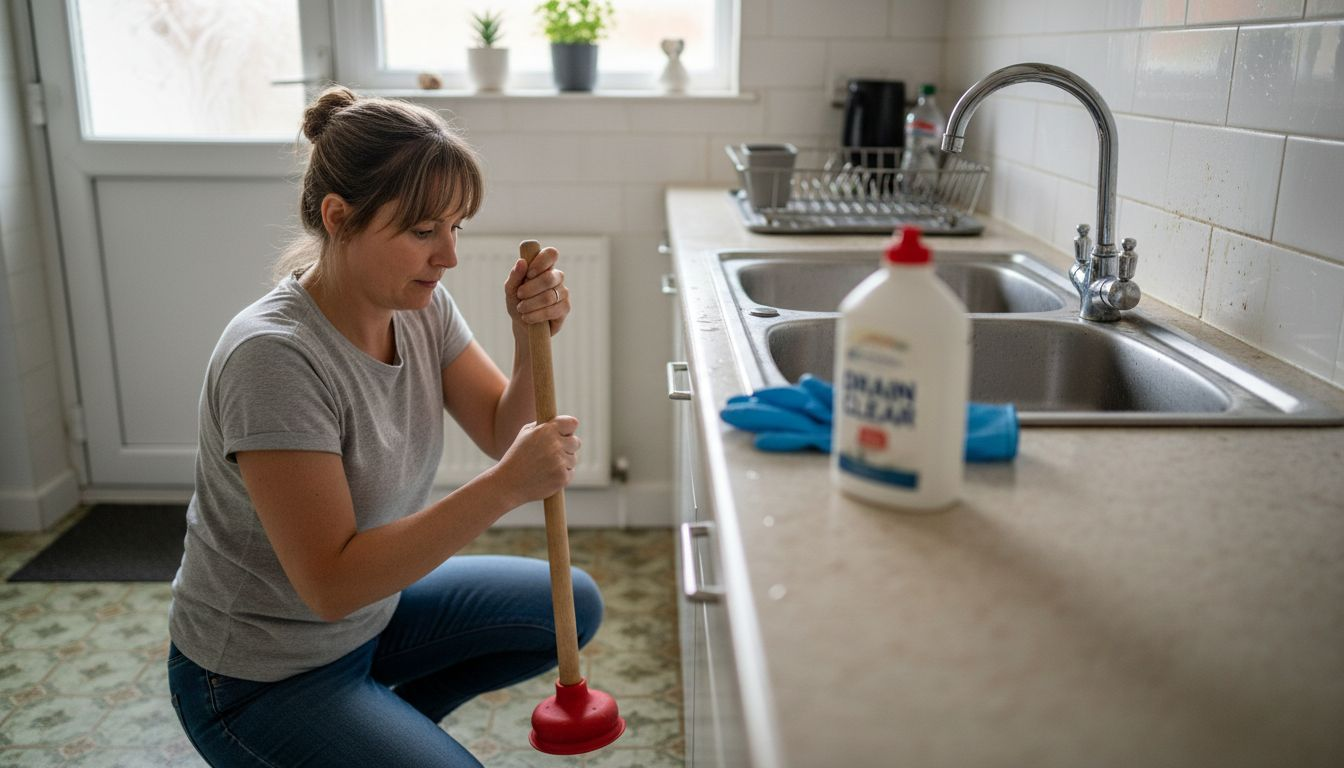
Start with the plunger method for surface blockages. Fill the sink or bath with enough water to cover the plunger cup completely. Position the plunger over the drain and push down firmly, then pull up sharply in a quick motion. Repeat this 15 to 20 times without breaking the seal. You’ll feel resistance decrease as the blockage loosens.
For blockages deeper in the pipe, manual clearing with drain rods works well. Feed the rod into the drain slowly, twisting it as you push forward. Don’t force it—let the rod do the work. Once you feel resistance, twist and push simultaneously to break through the blockage. Pull the rod back slowly, repeating as needed.
When dealing with grease build-up, understanding common blockage causes helps you select appropriate cleaning methods. Plungers work best here, but you can also flush the drain with boiling water after clearing to help dissolve residual grease.
For stubborn blockages, consider chemical cleaners as a secondary option:
- Use caustic soda products carefully, following all label instructions
- Never mix different chemicals as they can create dangerous fumes
- Wear gloves and eye protection throughout application
- Ensure good ventilation in your work area
- Allow adequate time for the product to work before flushing
Monitor your progress throughout the cleaning process. Does water drain faster? Listen for gurgling sounds, which indicate the blockage is breaking apart. Stop occasionally to check if the drain is clearing properly.
If you’ve tried plunging and rod clearing without success, the blockage may be deeper in the system or require professional equipment. Persistent blockages sometimes indicate structural issues requiring systematic inspection and professional treatment.
Patience and systematic approach beat forcing tools and causing pipe damage.
Pro tip: Always test your drain with hot (not boiling) water after clearing to flush away debris and verify you’ve fully resolved the blockage before considering the job complete.
Step 4: Verify drainage flow and inspect for remaining issues
After clearing the blockage, you need to confirm the problem is fully resolved and check for any underlying damage. This verification step prevents recurring issues and identifies when professional help is needed.
Start by testing water flow. Run water down the affected drain slowly and observe how quickly it drains. The water should disappear without pooling or gurgling. If it still drains slowly, the blockage may only be partially cleared. Repeat your cleaning method or investigate further with a torch to see if debris remains visible.
For multiple drains, check them all. Does water flow normally from sinks, showers, and toilets throughout your property? If only one fixture remains slow whilst others work fine, the blockage may be localised at that drain. If multiple drains drain slowly, you likely have a deeper system issue requiring professional assessment.
Now inspect the drainage area for signs of damage. Look for:
- Cracks or breaks in visible pipes
- Water pooling around inspection covers or in the garden
- Soggy patches of ground that remain wet even after clearing
- Unpleasant smells lingering after cleaning
- Collapsed or sunken sections of pipe
Post-cleaning inspections confirm that drainage flow rates have normalised and the system is functioning properly. Continued monitoring helps detect recurring blockages before they become serious problems.
If water still backs up or flows slowly after thorough cleaning, the issue lies deeper in your system. Broken pipes, root intrusions, or collapsed sections cannot be fixed with plunging or rods. This is when professional drainage inspection and assessment becomes necessary.
Document what you find. Take notes on how quickly the drain clears and any signs of damage you observe. This record helps professionals understand your drainage history if future problems occur.
A fully clear drain should empty completely within seconds, not slowly or with hesitation.
Pro tip: Run your drain with hot (not boiling) water twice weekly for the next month after clearing—this flushes any remaining debris and helps prevent the blockage from reforming.
Step 5: Restore the area and maintain preventative measures
With your drain now clear and verified, it’s time to tidy up and put systems in place to stop this problem happening again. Prevention is far cheaper than emergency call-outs and repeated blockages.
Start by restoring your work area. Return any garden items you moved, dispose of collected debris safely, and clean up any water spillage. Ensure inspection covers are properly sealed and accessible for future maintenance. If you’ve used chemical cleaners, dispose of containers according to local regulations and never pour leftover chemicals down the drain.
Next, focus on preventing future blockages. Most drain problems stem from user habits, so changing what goes down your pipes makes a real difference.
Stop flushing inappropriate items:
- Wet wipes, even those labelled flushable
- Cotton pads and cotton buds
- Hair (use a drain trap instead)
- Nappies or sanitary products
- Food waste and vegetable peelings
For kitchen drains, never pour fats, oils, or grease down the sink. Let cooking oil cool and solidify, then bin it. Wipe greasy pans with kitchen roll before washing them. These simple steps prevent the grease build-up that causes recurring blockages in Poole’s older drainage systems.
Implement a maintenance schedule. Regular cleaning and monitoring detects problems early before they become costly corrective works. Monthly maintenance includes flushing drains with hot water and checking for slow drainage warning signs. Quarterly, inspect accessible inspection covers for signs of damage.
Keep gutters and downpipes clear of leaves and debris. Poor drainage in gutters forces water down pathways and into your system, creating additional pressure. Clean gutters seasonally, especially in autumn when leaves accumulate.
Document your maintenance efforts. Note when you cleaned drains, any issues observed, and professional help sought. This record becomes invaluable if drainage problems persist or worsen.
Small preventative habits now save thousands in emergency drainage repairs later.
Pro tip: Pour a kettle of boiling water down each drain weekly—this keeps pipes clear, flushes away minor debris, and costs nothing whilst preventing blockages from forming.
For ongoing drain health, compare the benefits of regular preventative actions:
| Preventative Action | Benefit | Frequency |
|---|---|---|
| Flush with hot water | Prevents minor build-up | Weekly |
| Clear inspection covers | Early blockage detection | Quarterly |
| Clean gutters | Stops overflow into drainage | Seasonally, especially autumn |
| Log maintenance actions | Eases future repairs | After every activity |
Professional Drain Cleaning Solutions Tailored for Poole Residents
Blocked drains can disrupt your home or business and lead to costly damage if not tackled effectively and safely. This article helped you understand the critical steps in assessing blockages, selecting the right tools, and verifying full drainage flow. Still, many blockages linked to older pipework, root ingress, or collapsed sections require expert intervention beyond DIY methods.
Our experienced team at Blocked Drains Poole specialises in managing Poole’s unique drainage challenges. Whether it is stubborn blockages, detailed CCTV inspections, or modern repairs like pipe relining, we offer transparent pricing with no call-out fees and rapid 24/7 response. Taking immediate action prevents recurring problems and protects your property from worsening drainage damage.

Do not let minor blockages turn into major headaches. Contact us today for professional drain unblocking and inspection services crafted for the demands of Poole properties. Visit Blocked Drains Poole now to request a quote or emergency assistance and enjoy peace of mind with trusted local expertise.
Frequently Asked Questions
How do I identify the cause of a blocked drain in Poole?
To identify the cause of a blocked drain, observe the symptoms like pooling water or slow drainage. Check common culprits such as fats, oils, grease, or hair accumulation, and monitor multiple drains to determine if the issue is localised or systemic. Take notes on any signs to guide your next steps.
What tools do I need for effective drain cleaning?
For effective drain cleaning, you should gather a plunger, drain rods, a bucket, and a drain brush. Ensure all tools are in good working order and have proper personal protective equipment like heavy-duty gloves and safety goggles ready before starting work.
How can I safely clear a blockage with a plunger?
To safely clear a blockage with a plunger, fill the sink with enough water to cover the plunger cup, then push down firmly and pull up sharply in a quick motion. Repeat this 15 to 20 times without breaking the seal to effectively loosen the blockage.
What should I do if the drain remains slow after cleaning?
If the drain remains slow after your cleaning efforts, it might indicate a deeper issue within the plumbing system. Consider using drain rods for deeper obstructions or contact a professional to assess any potential structural problems.
How can I prevent future blockages in my drains?
To prevent future blockages, change your disposal habits by not flushing inappropriate items such as wet wipes or cooking fats. Implement regular maintenance practices, such as flushing your drains with hot water weekly and cleaning inspection covers quarterly, to maintain smooth drainage.
What steps should I take after clearing a blocked drain?
After clearing a blocked drain, test the water flow to ensure it drains properly and inspect for any signs of damage. Document your findings and restore the area by cleaning up any debris and ensuring inspection covers are properly sealed for future access.
Recommended
- Emergency Drain Unblocking Workflow for Poole Homes
- How to Unblock Commercial Drains Safely and Efficiently
- High-Pressure Drain Cleaning: Restoring Poole’s Blocked Pipes
- Drain Unblocking Procedure 2026 for Effective Results
- Blocked Drain Solutions For Sacramento Homes Made Simple – Legacy Plumbing & Drain – Emergency Plumbers Of Sacramento
- Drain Cleaning Service Performed For Maintenance Project in Tampa FL 33626 Home Therapist Cooling, Heating, and Plumbing